Trezor.io/start – Official Guide to Setting Up Your Trezor Hardware Wallet
Cryptocurrency provides unmatched financial freedom, but it also comes with responsibility. Unlike traditional banks, crypto transactions are irreversible, and losing access to your wallet or private keys can mean permanent loss of funds. Hardware wallets are widely recognized as the safest way to store crypto. Trezor, a pioneer in hardware wallet technology, provides an official starting point for setup: Trezor.io/start.
This official portal guides users through every step of setting up their Trezor device, installing verified software, and implementing best practices for long-term wallet security.
What Is Trezor.io/start?
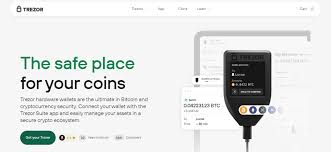
Trezor.io/start is the verified setup page for new Trezor wallet users. It provides step-by-step instructions, official software downloads, and tools to confirm your device is genuine and secure.
Supported Trezor devices include:
Trezor Model T
Trezor One
Using the official portal reduces the risk of counterfeit devices, phishing websites, and preconfigured wallets that could compromise your private keys.
Why a Trezor Wallet Is Important
Storing crypto on exchanges or online wallets exposes assets to hacking, malware, or service outages. Trezor hardware wallets protect your assets by keeping private keys offline. Even when connected to a computer or smartphone, your keys remain securely stored within the device.
Key benefits of a Trezor wallet include:
Offline private key storage
Open-source firmware for full transparency
Manual transaction approval on the device
Supports thousands of cryptocurrencies
Compatible with desktop and mobile apps
Starting setup at Trezor.io/start ensures all these protections are properly enabled.
Step-by-Step Trezor Wallet Setup
Step 1: Access the Official Website
Open a secure browser and type Trezor.io/start manually. Avoid clicking links from emails or social media to prevent falling victim to fake websites.
Step 2: Install Trezor Suite
Trezor Suite is the official software used to manage your wallet. With it, you can:
Create and manage multiple cryptocurrency accounts
Install apps for supported cryptocurrencies
Send and receive crypto securely
Track balances and transaction history
Trezor Suite is available for Windows, macOS, Linux, and as a web application.
Step 3: Connect Your Trezor Device
Use the included USB cable to connect your device to a computer or mobile device. Confirm that the packaging was sealed before opening to ensure authenticity.
Step 4: Initialize Your Wallet
Select “Create a new wallet” in Trezor Suite. This generates private keys directly on the device, giving you full control over your funds.
Step 5: Set a PIN Code
You will be prompted to create a PIN for security.
PIN best practices:
Avoid simple sequences like 1234
Do not reuse existing PINs
Never share your PIN
Multiple incorrect PIN attempts will automatically reset the device to protect your funds.
Step 6: Record Your Recovery Seed
Your Trezor device will generate a 12-, 18-, or 24-word recovery seed, depending on your model. This is the only backup for your wallet.
Recovery seed rules:
Write it on paper using the provided recovery card
Store it offline in a secure location
Never photograph or store digitally
Never share it with anyone
This recovery seed is critical for restoring your wallet if the device is lost or damaged.
Step 7: Verify the Recovery Seed
Trezor Suite will prompt you to confirm the recovery seed by selecting the correct words in order. This ensures your backup is accurate.
Installing Cryptocurrency Apps
Once setup is complete, Trezor Suite allows you to install apps for specific cryptocurrencies. Supported assets include:
Bitcoin (BTC)
Ethereum (ETH)
Litecoin (LTC)
Ripple (XRP)
Cardano (ADA)
Thousands of other tokens
Each app allows transactions to be securely signed on the Trezor device, keeping private keys offline.
Sending and Receiving Crypto
When receiving crypto, Trezor Suite generates a wallet address that must be verified on your device screen. This prevents malware from altering addresses.
When sending crypto, all transactions require manual approval on the Trezor device. This ensures unauthorized transfers cannot occur even if your computer is compromised.
Security Mistakes to Avoid
To keep your funds safe:
Only download Trezor Suite from the official website
Never enter your recovery seed online
Never share your recovery seed with anyone
Avoid preconfigured or second-hand devices
Trezor will never ask for your recovery seed.
Long-Term Wallet Security
Even after setup, maintain security by:
Keeping Trezor Suite and firmware updated
Using trusted devices and secure networks
Storing recovery seeds in fireproof or metal backups
Avoiding unknown wallets or suspicious applications
Conclusion
Trezor.io/start is the safest and official starting point for setting up a Trezor hardware wallet. By carefully following the step-by-step instructions, users maintain full control over their private keys while minimizing exposure to digital threats.
Whether you are a beginner or managing a long-term crypto portfolio, Trezor.io/start provides a secure foundation for protecting and managing your digital assets.